
The development of your application is ongoing, and you’re already thinking about publishing it on the App Store? Adding a new application to the Apple’s store can seem complicated, especially if you’re doing it for the first time. Our guide may prove invaluable to you in navigating this process smoothly. Check out how to easily add your application to the App Store.
This instruction will walk you through each step of adding an application to the Apple Store in a simple and understandable way.
Step 1_ Join the Apple Developer Program and Log in to App Store Connect
App Developer Program
Registering on the Apple Developer Program is essential to gain access to App Store Connect and the ability to distribute your app on the App Store. This program requires an annual membership fee of $99. You can register as a company or create a personal account. The fee remains the same whether you create a personal or a business account.
Choosing a business account allows you to add various members to your team and define their roles. The person who sets up a business account plays a crucial role of the Account Holder, which enables granting access to other team members such as administrators, app managers, developers, and individuals responsible for finance, marketing, sales, or customer service. To add new members, you need to provide their names and email addresses. Your company’s name will be displayed in the App Store under the “Developer” section. You can learn more about creating a developer account from this article.
App Store Connect
The next step is to join App Store Connect, a platform that enables the management, testing, and distribution of apps for various Apple devices. Logging into App Store Connect is done through the same Apple ID used in the Apple Developer Program. Initiating the process of adding an app requires accepting the terms found in the Agreements, Tax, and Banking section and, for paid apps, providing banking and tax information.
Step 2_ Preparation for Submission
To submit the build of your app, the Account Holder must create the first app record. To do this, select “New App” from the drop-down menu and press the addition (+) button in the upper left corner, then enter the app information.
Platforms – Here you specify at least one Apple platform for your app. iPadOS and watchOS apps are treated as part of the iOS platform.
Name – This is the name of the app visible to users in the App Store and after installation on a smartphone. It should be easy to remember and reflect the app’s features. From 2 to 30 characters.
Primary language – The main language for app information. If a translation is not available in a particular country or region, the primary language will be used.
Bundle ID – Choose the app identifier registered on your Developer account. It must be consistent with the one used in Xcode. It cannot be changed after submitting the first build.
SKU (Stock Keeping Unit) – A unique identifier for your app, which is not visible to users. It can be useful for resource management.
Users Access – Specify which members of your organization in App Store Connect can have access to the app.
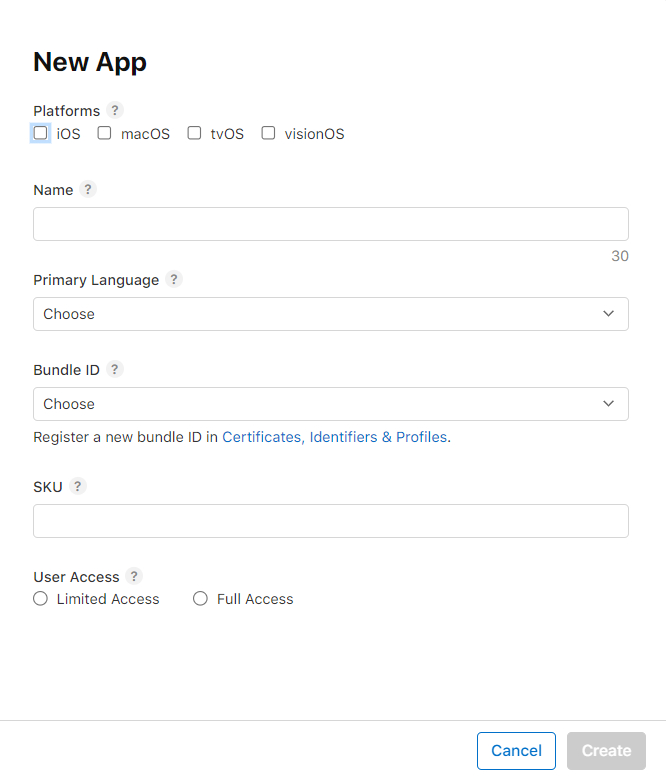
After filling in the required fields, click “Create” and proceed to the Product Page.
Step 3_ Product Page
To add an app, you also need to prepare the necessary graphic and text materials in accordance with App Store guidelines, which will be visible to users. These elements are crucial to presenting your app attractively and encouraging downloads.
The product page consists of 3 categories:
- iOS App
- General
- App Store.
Step 4_ iOS App Tab
iOS App / Version Information
Here, you fill in information about the current version of your app. This section includes:
- App preview,
- screenshots,
- video.
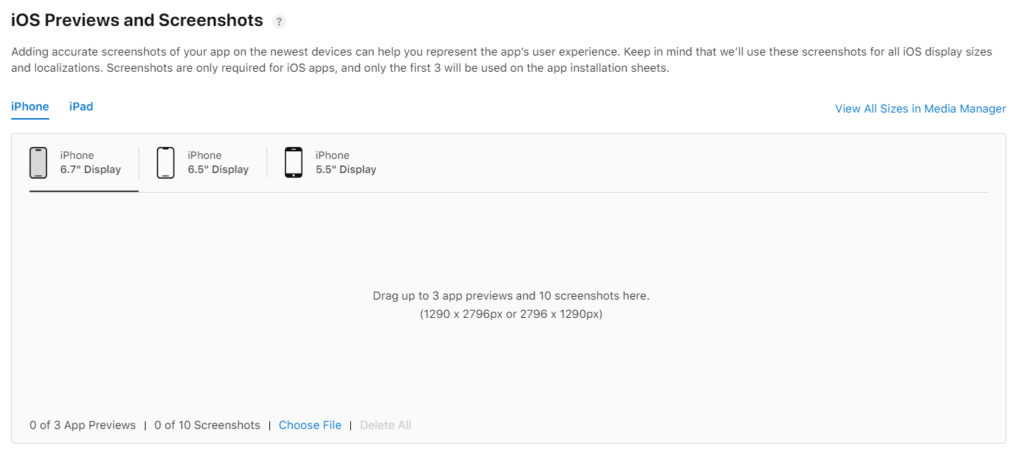
To grab users’ attention and encourage them to download and try your app, an attractive interface design is crucial. You need to prepare:
Screenshots: Choose views that best illustrate your app’s functionalities. Screenshots should be saved in JPG or PNG format, RGB color palette. Select up to 10 screenshots of the app according to App Store requirements:
- for iPhone models 6.7 and 6.5-inch and 5.5-inch in portrait or landscape orientation, 1290 x 2796px or 2796 x 1290px
- optionally for iPad Pro 12.9-inch (separate graphics for 2nd and 6th generation), 2048 x 2732px or 2732 x 2048px
Video: You can upload up to three app previews, each up to 30 seconds long, in M4V, MP4, or MOV formats. The maximum file size is 500 MB. Adding previews is not required but enhances the app’s appeal.
To make your video clear and understandable, you can enrich it with text, graphics, and background sound. A poster frame, i.e., a thumbnail, prepared in accordance with the guidelines, must also be attached to each video.
If you want experts to take care of the entire process of creating and publishing an application
Contact usPromotional Text (optional)
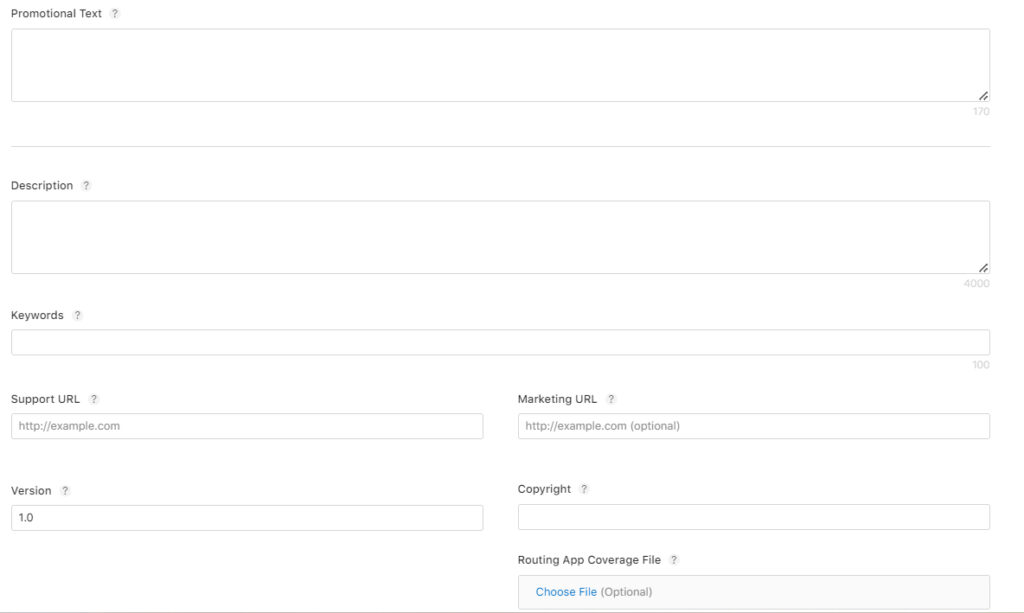
This allows you to inform App Store users about the current features of your app. It appears above your app’s description for customers using iOS 11 or newer and macOS 10.13 or newer. Up to 170 characters long.
Description
Tell potential users of your app why they should download it. Describe the app’s features in an engaging way and present reasons for its installation. It’s important to include the most crucial information at the beginning, as most users do not read the description to the end. The description can be edited during app updates. Limit: 4000 characters.
Keywords
To increase your app’s visibility in search results, use keywords related to the product and its functionalities. Max 100 characters.
Support URL (optional Marketing URL)
The App Store requires you to provide a URL for your app’s support page, and optionally, a URL for marketing materials. If you do not have a dedicated website for your app, creating a Facebook page for it and posting information there could be a good idea.
Version
The version number of the application you are adding. The numbering should adhere to software versioning conventions.
Copyright
Provide the name of the person or entity that holds exclusive rights to your application, preceded by the year the rights were obtained, e.g., 2024 Name.
Routing App Coverage File (optional)
Here you can specify the geographic area covered by your application. This should be a .geojson file. It is optional, and you do not need to include a file if it is not necessary. Learn more about this here.
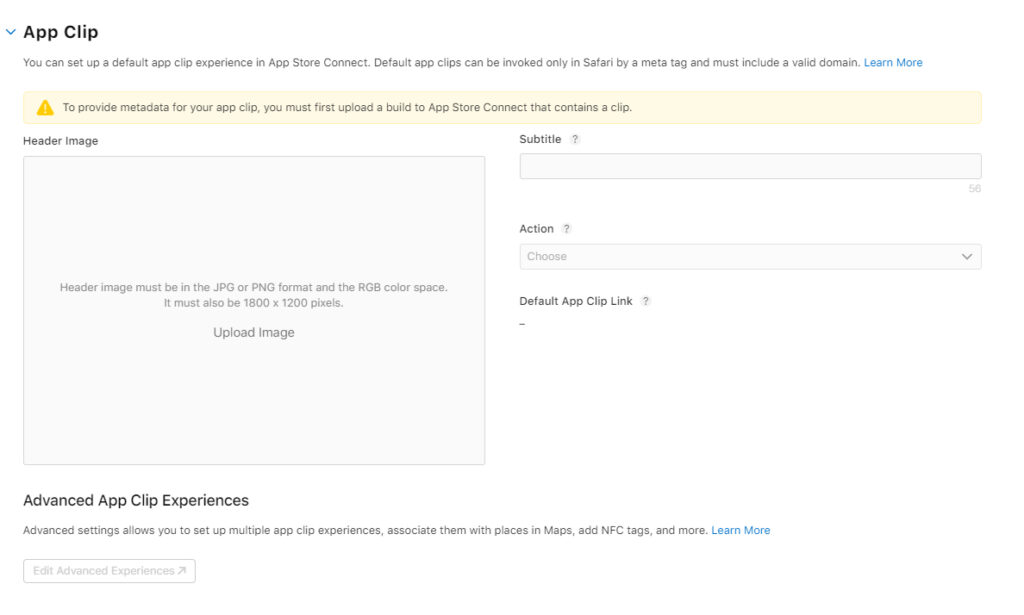
App Clip (optional)
If you want to allow users to access a small portion of the app through Safari without the need for download and installation, complete this section. To add an App Clip, prepare a header image in PNG or JPG format with a resolution of 1800×1200 px and add a subtitle (up to 56 characters) explaining the purpose of the app, as well as a CTA (Call To Action) that will appear on the button, e.g., “Open”.
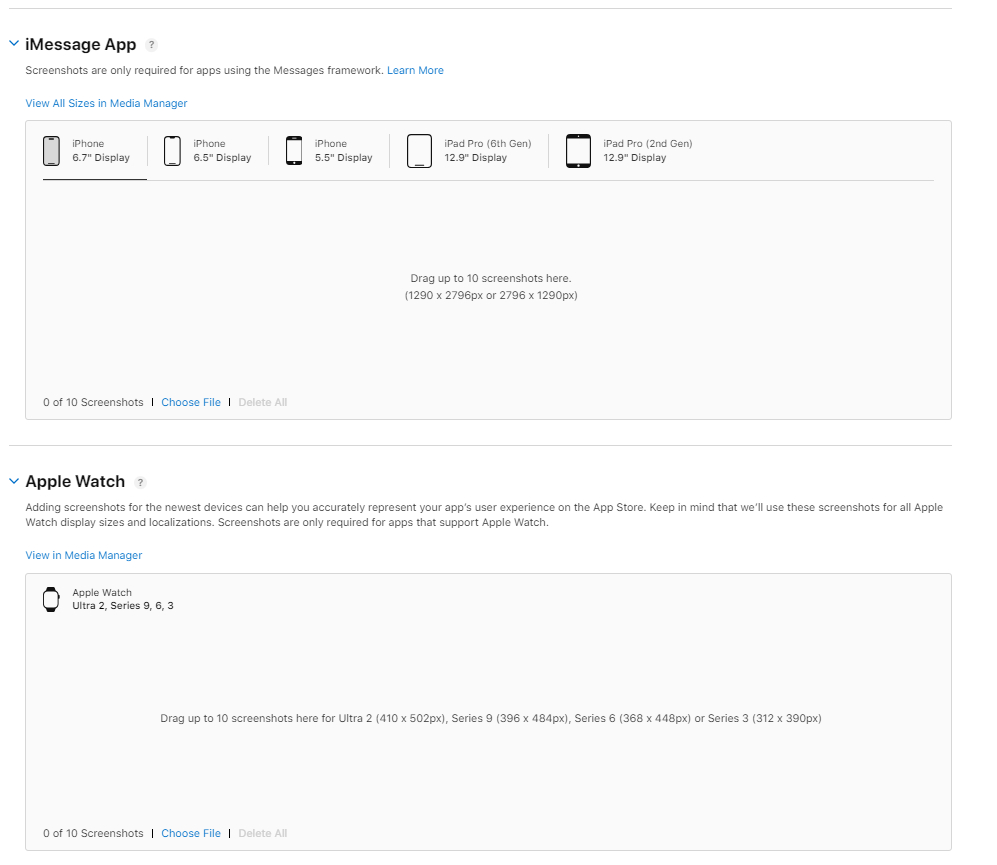
iMessage App (optional)
If your application uses the iMessage framework, additional screenshots are required. You can add up to 10 application screenshots with dimensions of 1290 x 2796 px or 2796 x 1290 px.
Apple Watch (optional)
This part is only required if your application supports Apple Watch. You can upload up to 10 application screenshots, with dimensions for Ultra 2 (410 x 502px), Series 9 (396 x 484 px), Series 6 (368 x 448 px), or Series 3 (312 x 390 px). These screenshots will be used for all Apple Watch screen sizes and all locations.
App Build
To publish your app on the Apple App Store, it must be properly verified. This process begins by adding the app’s build to the platform, which allows for testing and submitting the product for review. The initial upload of an iOS app is performed by a developer who must have the Developer role in App Store Connect. This person is responsible for delivering builds, entering additional information, and uploading screenshots.
Developers include an additional file within the app folder – the app icon, which is later automatically extracted during the app-building process.
The app icon is the first visual element users encounter when your app appears in the store. This icon is also widely used in other places, such as the home screen, spotlight, settings, or notifications. Importantly, it is not added directly through App Store Connect.
The icon should feature a simple design. Avoid creating icons with text. The corners of the icon in iOS and iPadOS should not be rounded.
The icon must be prepared in 1024×1024 px resolution and saved in PNG format. It’s important that the image is saved in one of the preferred color spaces: P3, sRGB, or Gamma 2.2. The system automatically generates files in various sizes, adjusting the icon to meet the needs of different devices and contexts.
You can create the icon yourself using a template available on the Apple Design Resources page, or you can commission its design from your designer.
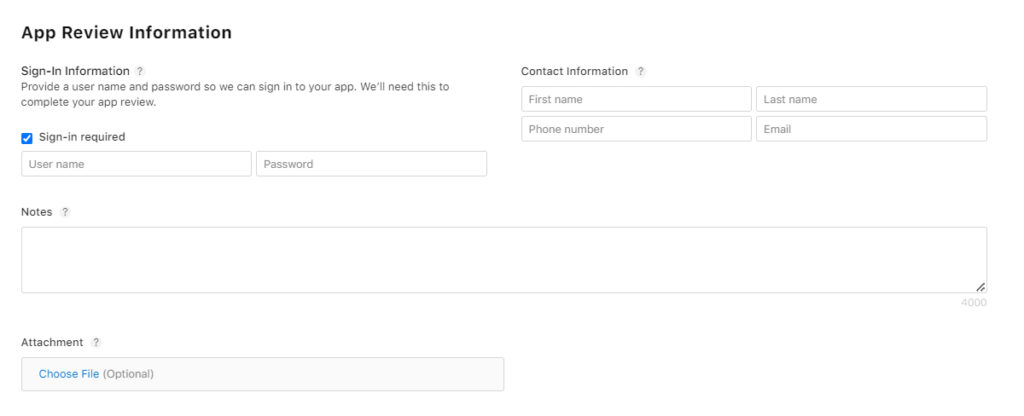
App Review Information
Verifying the operation of the application is required, so you must enable verification by the Apple team. If your app requires login, you must provide login details (password, login, or social account data) that will allow the tester to sign in. Your app must comply with the App Store guidelines and meet the required standards.
The App Store also requires contact information for someone in case the app review team has any questions or needs additional information.
Here, you can also attach additional documents for the reviewer – application documentation, demo videos, or other elements that can help avoid delays during the app review process.
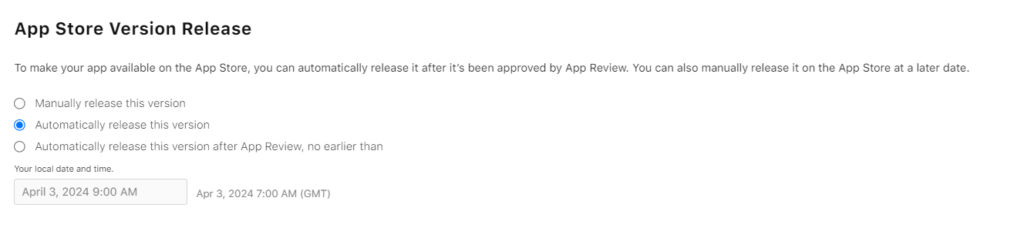
App Store Version Release
You can set the date and time for the official release of your app or publish it automatically immediately after a positive verification.
Step 5_ General Tab
App Information
Here, you must fill in the remaining information about your app. Some of it will be automatically completed based on previous information. If you make changes here, they will be published with the next version of the app.
Subtitle – Appears right under the app name. Up to 30 characters. It’s a brief explanation of what the app is used for, usually highlighting the main features of the app.
Category – You should choose one primary category that best reflects the functionality of your app. You can optionally choose a second category. The main category should directly reflect the main features of the app, allowing it to be displayed to users interested in that category. If you’re unsure which categories are best for your app, it’s worth looking at what categories your competition chooses.
Content Rights – If your app contains, displays, or accesses any third-party content, you must have the rights to use this content. The privacy policy must comply with App Store policies and local laws.
Age Rating – Specify the age range for your app’s users to help them understand if it contains any content considered inappropriate.
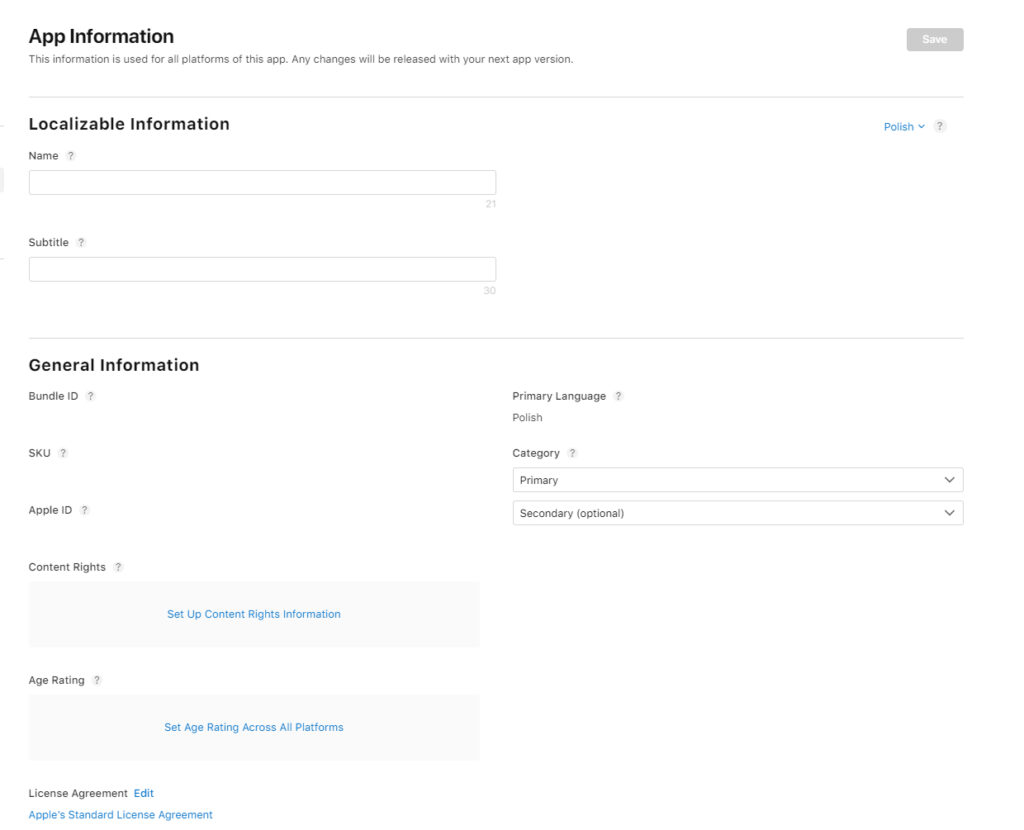
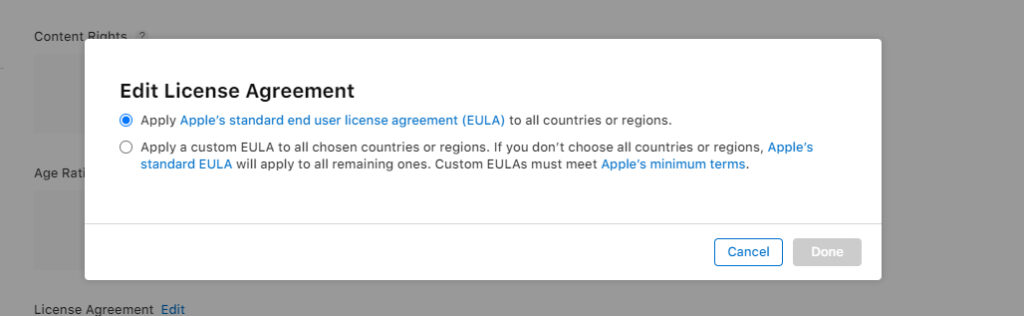
License Agreement – The iOS app you submit to the App Store must meet all legal requirements wherever it is made available. Apple pays particular attention to how user data is processed and whether apps meet the terms consistent with the licensing agreement. You can use Apple’s standard EULA or add your custom agreement tailored to specific needs, which can cover multiple regions or be specific to one of them. The license outlines agreements regarding data collection and storage, data use and sharing, protection of health research data, and data collection from children.
Your app should only contain content that you have created or for which you have a license to use. If you use someone else’s content without the appropriate rights, the app may be removed from the store.
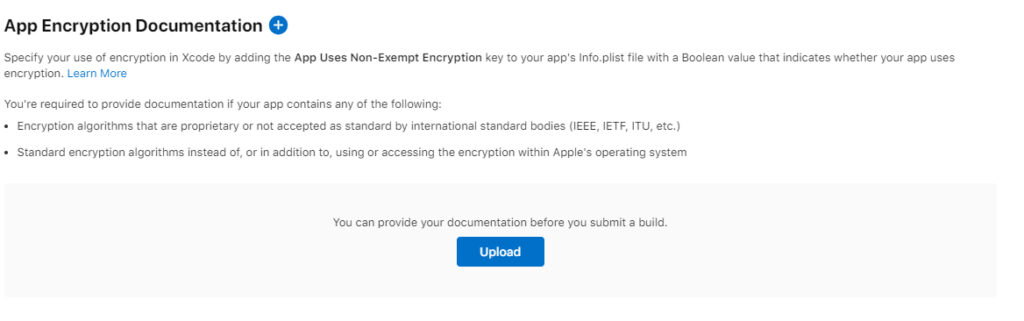
App Encryption Documentation
You must specify whether your app uses encryption, and if so, you are required to include the appropriate documentation.
App-Specific Shared Secret
A unique code used for retrieving receipts if your app has auto-renewable subscriptions.
Step 6_ App Store Tab – Selected Topics
App Privacy
Here, you are required to include your app’s privacy policy URL. After clicking “Get Started,” you will be asked to provide some information about your app’s data collection practices. This information will appear on your app’s product page, where users can see what data your app collects and how it is used.
Pricing and Availability
Here, you can set the price of your app, i.e., the amount a user must pay to download your app. Your revenues will be the profits earned from the sale of the app, of course, after deducting Apple’s commission and taxes. As of January 2021, Apple takes a 15% commission from developers who earn less than $1 million per year. You can also set the price of your app for a specific period if, for example, you want to initially lower the price of your app to encourage users to download it.
You can also specify the countries and regions where the app will be available. By default, all countries are selected. This is a useful feature, for example, if you’ve created an MVP version of your app and want to test it in one country for the time being.
In-App Purchases
If your app allows users to make purchases of virtual products, you can define them here. Apple distinguishes 4 types of in-app purchases:
- Consumable – various one-time, virtual products, e.g., buying lives in games.
- Non-consumable – premium features purchased once and never expire, e.g., filters in photo editing apps.
- Auto-renewable subscription – subscriptions for which payments are regularly charged until users cancel them.
- Non-renewing subscription – this type of subscription does not renew automatically, so users need to purchase a new subscription after it ends if they want to retain access.
Step 7_ Testing the App with TestFlight
Testing is an integral part of the app development process, allowing for feedback collection and necessary corrections. Thanks to TestFlight, a tool offered by Apple, developers can test the beta version of mobile apps. Such tests – both internal and external – help refine the app before its official publication in the App Store.
TestFlight is an app available for download in the App Store that lets you test the beta version of apps. To enable testing of your app, simply send an invitation via email or share a public link. Then, the person who accepts the invitation or opens the app link will gain access to it. During the beta testing of the app, you can provide feedback to the developer about any found issues or suggestions for improvements. Feedback is sent via TestFlight.
Step 8_ Publishing the App in the App Store
After completing the tests, you can submit your app for verification in the App Store. Verifying the app’s operation is required, so you must enable verification by the Apple team. For this purpose, you must provide login details (password, login, or social account data). Your app must comply with the App Store guidelines and meet the required standards.
After successfully passing the verification (this process usually takes from 24 hours to several days), you will receive an email notification informing you that the process has been completed. If the app is rejected, you will receive instructions explaining the reasons for the rejection. In such a case, you will need to correct the indicated issues and resubmit the app for verification.
After acceptance, you can set the date and time for the official release of your app or publish it automatically immediately after a positive verification.
Summary
Although the process of publishing an app on the App Store may seem complicated, this guide will help you easily navigate through each step. Prepare the required documents, graphical materials, and content, follow our instructions, and enjoy your app in the App Store!